Working with rows, columns, and cells
In Excel, each worksheet is organized into a grid of
Cell addresses
Take a look at the below diagram, which shows rows, columns, cells, and ranges all in one place:
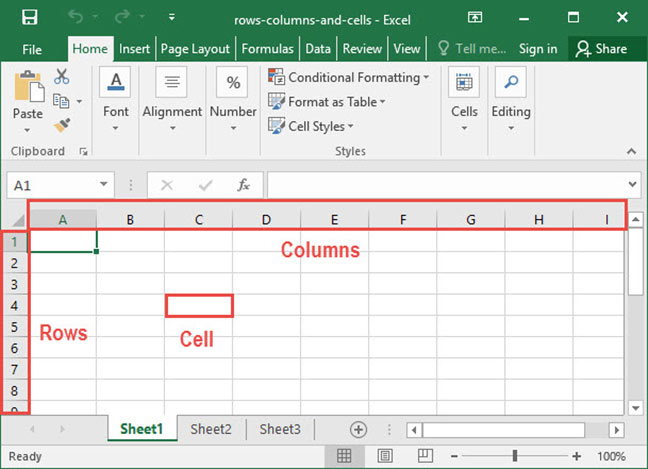
As you can see, Excel labels
At the intersection of each row and column is a
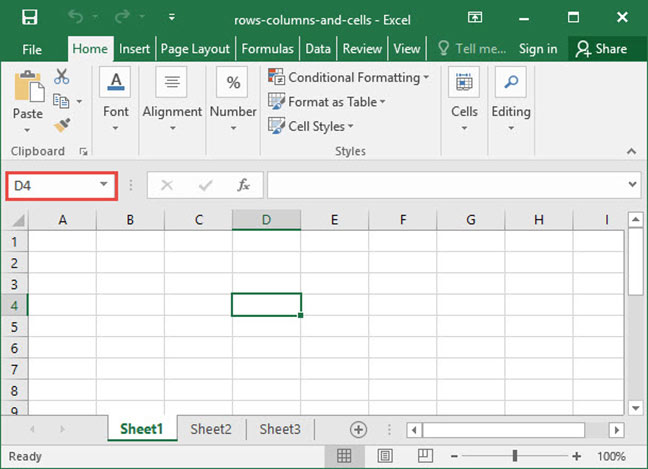
Whenever you select a cell, you'll see its address appear in the
Cell ranges
Multiple cells can be grouped into
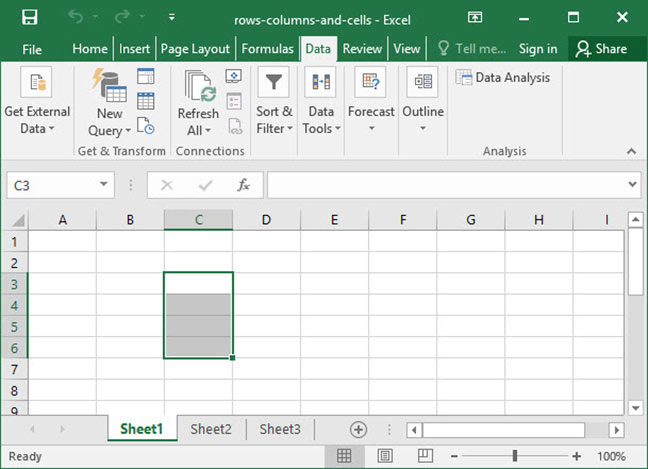
In this worksheet, we've highlighted the range of all cells between
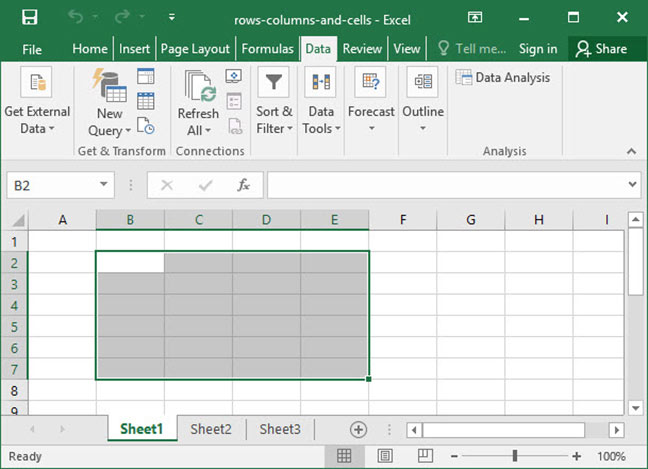
We can also talk about ranges that span multiple rows and columns, like
Manipulating rows and columns
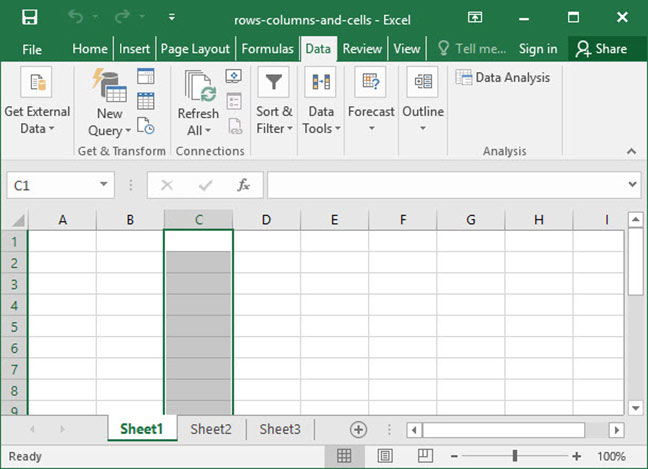
There are many things you can do to manipulate a row or column; but before you can do to, you must select it.
To select a single row or column, click the label of that row or column at the left or top of the screen:
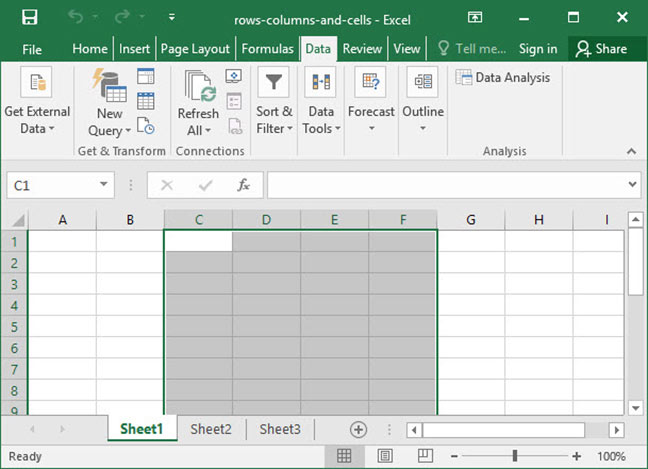
To select multiple rows or columns, click the label of one row or column and keep the mouse button held down, then drag over to select multiple:
To select all rows and all columns in a worksheet, click the small box that appears at the intersection of row

Once you have rows or columns selected, right click their labels to bring up the
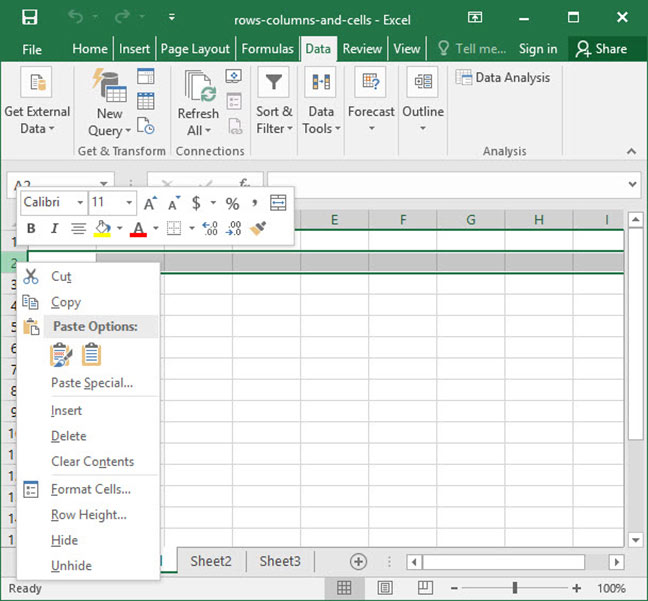
This menu has a variety of functions, and will allow you to do any of the following:
- Cut / copy / paste rows or columns. Use this if you would like to duplicate rows or columns, or if you would like to rearrange their order.
- Insert new rows or columns. This will insert new rows above — or new columns to the left of — the row or column you have selected.
- Delete rows or columns. This will delete the rows or columns in question entirely and collapse the remainder of the sheet in to take the place of the removed row or column.
- Format rows or columns. Use this option to apply formatting to each cell within a row or column. Potential formatting options include text colors, background colors, and borders.
- Hide and unhide rows or columns. Use this option to temporarily hide or unhide rows or columns. This makes it easier to manage large spreadsheets by hiding non-critical data.
You can also resize a row or column by hovering your mouse over the divider between two rows or two columns, then clicking and dragging to expand or contract it.
Manipulating cells
Cells can be manipulated just like rows and columns. To do so, select a cell or range, then right click. The
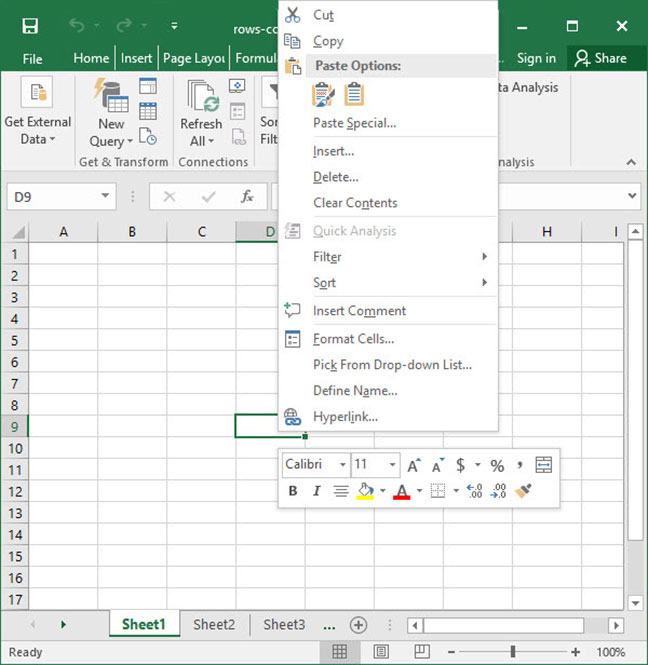
This menu allows you to:
- Cut / copy / paste cells. Use this to duplicate cells from one place in your worksheet to another.
- Insert new cells. Note that when you insert a cell, you'll have to tell Excel how to do it (you must either shift rows or columns in the existing sheet to accomodate the new cell).
- Delete cells. Like insertion, deletion also causes a shift in your sheet. Excel will ask you where you want cells to shift when you delete a cell.
- Format cells. Use this option to apply formatting to each cell. Potential formatting options include text colors, background colors, and borders.
Those are the basics of row, column, and cell manipulation in Excel. There's much more to learn — we've only scratched the surface! — but you should now have a solid foundation on which to build. Questions or comments? Let us know below!
Explore the 5 must-learn 'fundamentals' of Excel
Getting started with Excel is easy. Sign up for our 5-day mini-course to receive easy-to-follow lessons on using basic spreadsheets.
- The basics of rows, columns, and cells...
- How to sort and filter data like a pro...
- Plus, we'll reveal why formulas and cell references are so important and how to use them...